Add a QR code entry to DSH for screen sharing. Users scan the QR code with their phone to view and operate DeepSeek Harness on the computer in real-time. Connects directly over LAN or via cloudflared tunnel for public networks.

- Language
- JavaScript
- License
- GPL-2.0
- Branch
- main
Install
$ dsh plugin --profile web add dsh-pocketRun the command above in your terminal to install this plugin via the dsh CLI. You can switch Profile in the top-right corner. New to dsh? Read the beginner tutorial
Install via your agent
Install the DeepSeek Harness plugin shaobeichen/dsh-pocket for me: review the repository at https://github.com/shaobeichen/dsh-pocket first, then run the install command and verify the plugin loads successfully.
Paste this instruction to the DSH Web GUI assistant — it will install and verify for you.
One-Line Description
Add a mobile entry point to DeepSeek Harness on your computer: scan the QR code on your phone to see the same interface as your computer in the browser, view outputs, send tasks, and approve actions.
Core Features
- LAN QR Code Direct Connection: After the plugin starts, it automatically launches a proxy. Scan the QR code in the settings page to access DSH on your computer via the same WiFi
- Public Network QR Code Penetration (usable from anywhere): One-click cloudflared tunnel setup generates a random public URL, accessible from 4G or any network to connect back to your computer
- Dual Password Isolation: Public network and LAN each have independent 8-digit passwords; public network password auto-refreshes each time it's enabled, invalidating old links immediately
- WebSocket Real-Time Screen Sync: Streaming output and event channel passthrough; when content is output on the computer, the phone scrolls in sync, with bidirectional operation support
- Mobile UI Adaptation: Narrow screens automatically switch to drawer layout, including status bar safe area and full-width session optimization
- Traffic Compression: Large JSON responses are automatically compressed using gzip/brotli streaming; long sessions can be compressed from ~17MB to ~1MB, making phone loading faster
- Tunnel Auto-Recovery: After DSH restarts, the cloudflared subprocess is recycled; the plugin will automatically relaunch the previous public tunnel on next startup based on persistent markers
- One-Click Update/Self-Restart: Settings page can detect new versions and automatically restart the host process (detached handoff, no port conflicts)
Technical Implementation
- Language: JavaScript (ESM + partial CJS) / includes inline HTML injection scripts
- Key Dependencies:
@deepseek-ai/cordis(host framework,peerDependencies),qrcode(generates QR code data URL),cloudflared(downloaded at runtime, public tunnel dependency) - Architecture Pattern: Single-package single-plugin, after injecting DSH Host, starts a 0.0.0.0 reverse proxy (default 3081) via
lib/index.js#applyto rewrite inbound request Host/Origin and forward loopback to local DSH; also registers settings page RPC viactx.connection.rpc.handleon/dsh-pocketloopback channel - Entry Files:
lib/index.js(Cordis apply),bin/dsh-pocket.mjs(standalone CLI),client/index.jsx(settings page React entry)
Use Cases
Scenarios like on the way home from work, during business trips, or moving from living room to study: when you're not at your computer but want to see what stage your computer's agent has reached, want to send new tasks to the computer's agent, or approve an operation. Another use case is locking your computer screen and making your phone the only control terminal, saving the hassle of setting up remote desktop or SSH.
Prerequisites & Compatibility
| Dependency | Minimum Version | Description |
|---|---|---|
| Node.js | >= 22 | Declared in package.json#engines |
| DeepSeek Harness (DSH) | Version compatible with @deepseek-ai/cordis ^4.0.1 | Repository does not explicitly declare specific DSH version in package.json |
| Platform | macOS / Windows / Linux | Cross-platform; first time enabling public network on Windows, downloading cloudflared is slower (single-threaded), can manually install or use proxy |
| Native Modules | None | All pure JS dependencies, cloudflared for public tunnel is a binary, downloaded on-demand to $DSH_HOME/dsh-pocket/bin/ on first enable |
Installation
dsh plugin --profile web add github:shaobeichen/dsh-pocket
Configuration
No additional configuration required. After the plugin starts, all adjustable options (LAN password toggle, password refresh, public tunnel toggle, one-click update/restart) are completed via UI in the "Mobile Access" tab of DSH's settings page. Internal files written:
$DSH_HOME/dsh-pocket/settings.json: LAN access password toggle (enabled by default, can be disabled via UI)$DSH_HOME/dsh-pocket/token: Public network access password (rewritten automatically each time public network is enabled)$DSH_HOME/dsh-pocket/token-lan: LAN access password (manually refreshed in settings page)$DSH_HOME/dsh-pocket/tunnel-auto.json: Public tunnel "enabled" marker for auto-recovery after DSH restarts$DSH_HOME/dsh-pocket/cloudflared(.exe): cloudflared binary cache downloaded when public network is first enabled
FAQ
Q: Where do I access it after installation?
A: After restarting dsh web, go to DSH's "Settings" page. The left sidebar will have an additional "Mobile Access" entry (same level as "General Settings" and "Models"). The LAN QR code appears immediately without any configuration.
Q: What's the difference between LAN and public network modes?
A: LAN requires phone and computer on the same WiFi; access goes through the internal network with low latency and no data usage. Public network mode obtains a random trycloudcloudflare.com subdomain via cloudflared tunnel, usable from 4G or any network, but the URL and access password change each time it's enabled.
Q: Is the access password required?
A: Public network links always require an 8-digit password (auto-refreshes each time enabled, old links immediately invalidated). LAN password is enabled by default and can be one-click disabled in the settings page LAN section - after disabling, devices on the same network can scan to connect directly (public network unaffected).
Q: Why didn't it take effect after installation/update?
A: You must restart the dsh web process; the running process still loads the old plugin code. There's a "One-Click Restart" button in the settings page (except for desktop environment), or restart dsh web in terminal before accessing.
Q: What to do if public network mode reports error 1033?
A: Usually caused by local proxy/VPN (Clash, Surge, v2ray, sing-box, etc. TUN/enhanced mode) cutting off the cloudflared tunnel. First try disabling only the proxy's TUN mode; if that doesn't work, completely exit the proxy software; still not working? Add direct routing rules to the proxy to allow argotunnel.com / trycloudflare.com; if network is truly unreachable, use "mobile hotspot + LAN mode" which works exactly the same.
Q: How to handle port 3081 being occupied?
A: When an old dsh-pocket process is still holding the port, the plugin automatically tries the next port (up to 10 consecutive). If still conflicting, manually end the old process: macOS/Linux use lsof -ti :3081 | xargs kill -9, Windows use netstat -ano | findstr :3081 to find LISTENING PID then taskkill /PID <PID> /F.
Q: Can it be used on DSH Desktop?
A: QR code screen sync works fine on desktop version, but one-click update and one-click restart are managed by DSH Desktop itself; this plugin actively disables these two features to avoid conflicts. Desktop "advanced" mode doesn't support mobile access yet (page will be overlaid with a hint), need to switch back to "compatibility" mode in desktop settings and restart.
Q: How to upgrade to 1.x version?
A: Use dsh plugin --profile web update dsh-pocket --latest -w (with --latest to cross ^0.x range to 1.x). After update completes, remember to restart dsh web for new code to take effect.
Difficulty Level
Beginner — After installing and restarting DSH, scan the QR code to use; when encountering proxy/port or other anomalies, check items one by one according to the README troubleshooting table. No concepts or configuration items need to be understood.
Known Issues & Limitations
- DSH Desktop "advanced" mode doesn't support mobile access yet (desktop advanced combo disables web ui-layout, mobile page gets compatibility patch but no desktop layout service). Settings page will automatically overlay a hint guiding user to switch to compatibility mode
- Public network tunnel depends on machine's outbound to Cloudflare edge nodes (
*.argotunnel.com,*.trycloudflare.comand Cloudflare edge IPs). Proxy/VPN TUN/enhanced mode often cuts off tunnel connections (manifests as error 1033) - If residual Homebrew bottle format cloudflared (ELF interpreter as
@@HOMEBREW_PREFIX@@placeholder) remains in cache directory on Linux, startup will directly report ENOENT; plugin detects bad cache by reading ELF file header and discards it, automatically re-downloading - Web Push Notifications have been removed: depends on overseas services like Google FCM, directly blocked in mainland China, regular users can't use it
- Installation package doesn't declare specific DSH host version range in
package.json#enginesorpeerDependencies, only declares need for compatibility with@deepseek-ai/cordis ^4.0.1
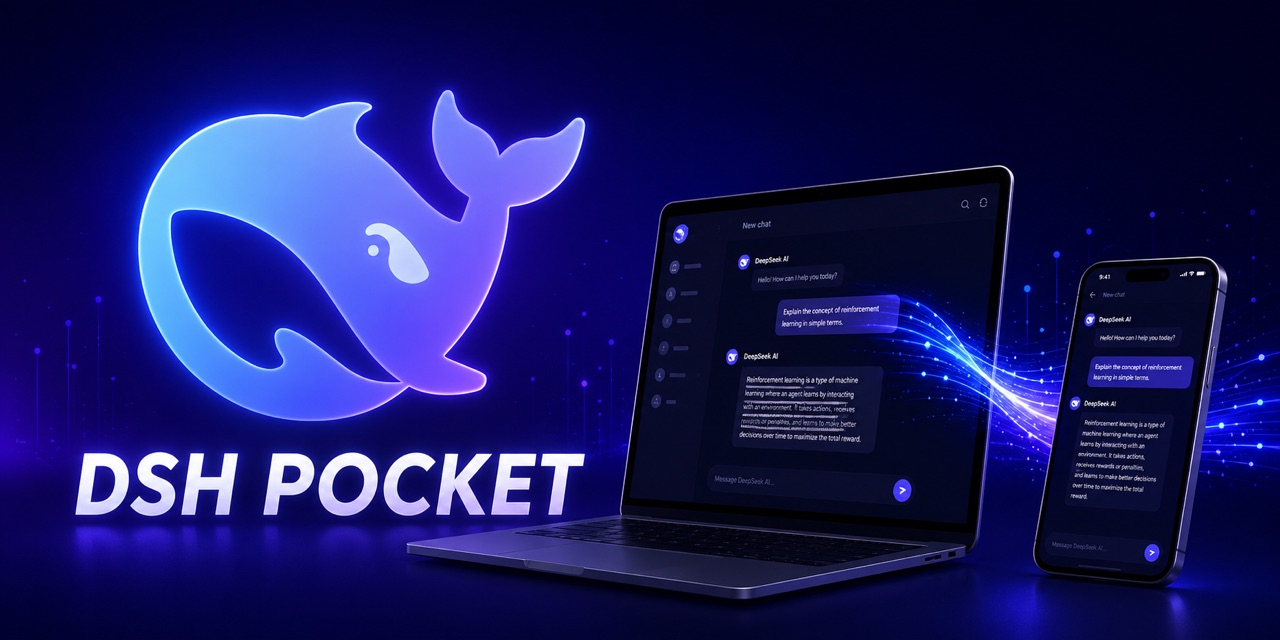
DSH Pocket





把 DeepSeek Harness 装进你的口袋:一个包、一个设置页,手机扫二维码就实时看到电脑上的同一个界面——人在外面也能用。
⭐ 顺手留颗 Star,作者能高兴一整天 · 行,给你一颗 Star
这是什么
你不在电脑前,也想用电脑上的 DeepSeek Harness。
- 下班路上,agent 在电脑上跑任务,你想掏出手机看看它干到哪了、结果如何
- 出门在外,突然想让电脑上的 agent 查点资料、写段代码,但没有远程桌面、没有 SSH
- 电脑在宿舍/办公室,你人在外面,想随时"操控你的 DeepSeek Harness"——发任务、看输出、点审批
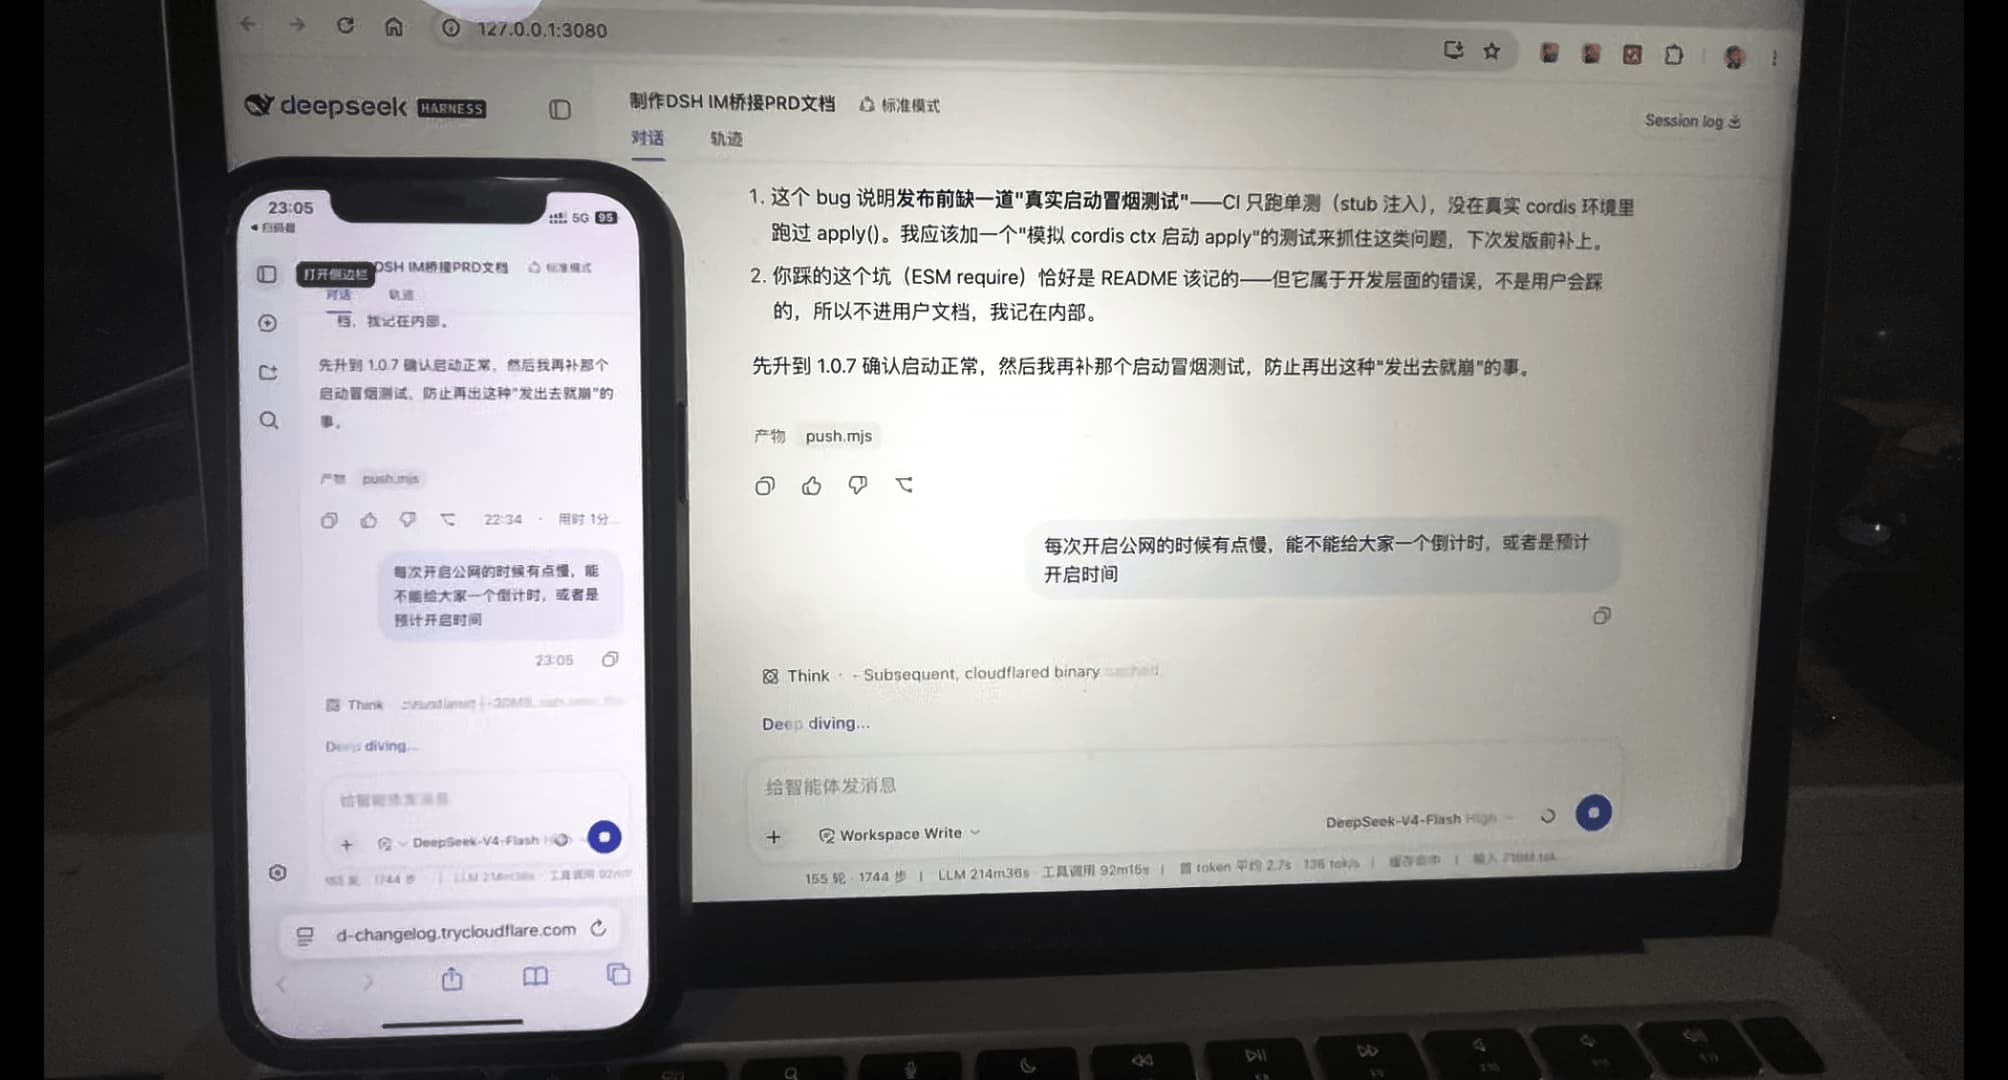
DSH Pocket 就是干这个的:装上它,手机扫个码,就能实时看到并操控电脑上的 DeepSeek Harness 界面——人在外面也能用。
实际效果——手机上的界面就是电脑上的界面,实时同步:
✨ 特性
| 特性 | 说明 |
|---|---|
| 📶 局域网扫码 | 装好即用:设置 → 手机访问,打开就有局域网二维码,手机连同一 WiFi 扫码即开 |
| 🌐 公网扫码(人在外面) | 点「开启公网访问」→ cloudflared 隧道 → 出公网二维码,4G/任何网络都能访问 |
| 🔐 访问密码 | 公网链接需输入 8 位数字密码(每次开启公网自动换新,旧链接立即作废);局域网有独立 8 位数字密码(默认开启,设置页可一键关闭——关闭后局域网扫码直连) |
| ⚡ 实时同步 | 流式输出走 WebSocket 全透传——电脑上在输出,手机上同步在滚,可双向操作 |
| 📱 移动端适配 | 窄屏自动变抽屉布局(移植 dsh-web-mobile,MIT):侧栏抽屉、会话全宽、状态栏安全区、触控优化 |
| 🗜️ 传输压缩 | 大 JSON 响应自动 gzip/brotli(长会话 17MB → ~1MB,brotli 质量 6:快且省流量),手机加载更快、更省流量 |
| 🔁 隧道自动恢复 | DSH 重启后自动重新拉起之前开着的公网隧道,无需手动重开 |
| 🧩 零依赖安装 | 一个 npm 包、一个设置页,没有核心/适配器要分开装;无需账号、无需服务器 |
🚀 怎么用
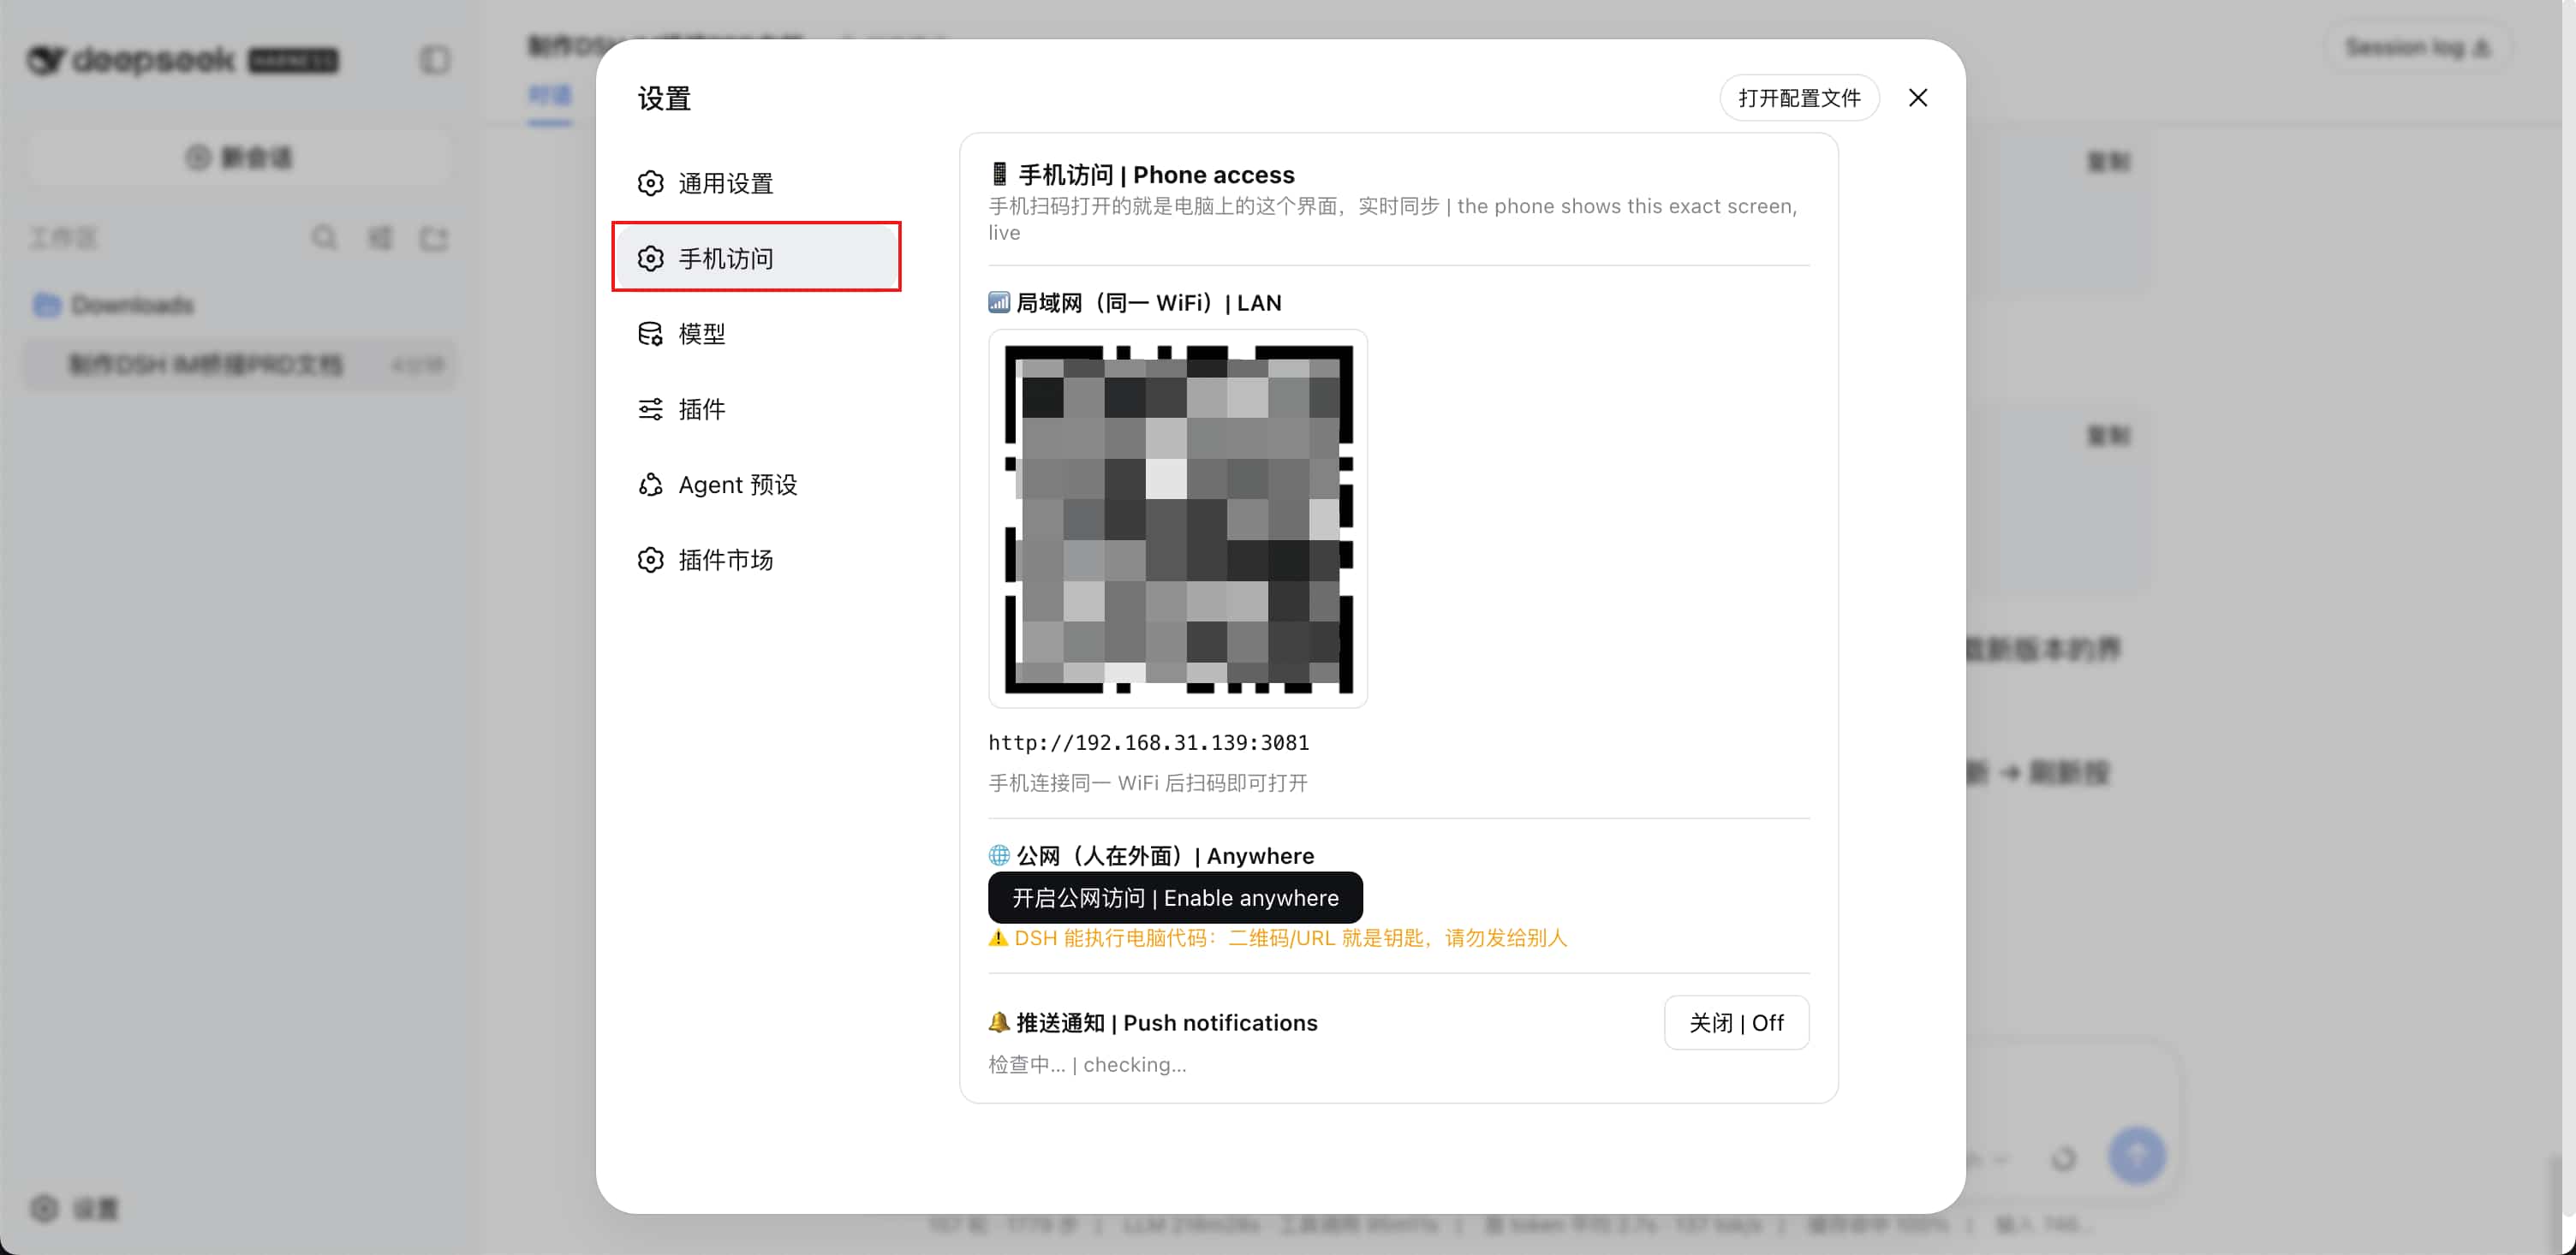
入口在哪:安装完成并重启 dsh web 后,打开 设置,左侧边栏就能看到 「手机访问」 入口(和「通用设置」「模型」同级):
前提:电脑上已装好 DeepSeek Harness。如果终端提示 dsh: command not found(找不到 dsh 命令),先安装:
npm install -g @deepseek-ai/dsh     # 全局安装;验证:dsh --version
# 不想全局装?每次命令前加 npx:npx @deepseek-ai/dsh <命令>
# 1. 装插件(一个包全都有)
dsh plugin --profile web add dsh-pocket -w

# 2. 重启 dsh web
npx @deepseek-ai/dsh web
局域网(同一 WiFi)
设置 → 手机访问 → 手机扫「📶 局域网」二维码 → 打开链接输入局域网密码(显示在设置页局域网区块,点「刷新」可换新)→ 打开的就是电脑上的 DSH,实时同步。
局域网密码默认开启(安全优先)。如果只有自己用、嫌每次输密码麻烦,可在设置页局域网区块把「局域网访问密码」切到关——之后局域网扫码直连、无需密码(仅同一局域网设备可访问;公网始终要密码,不受影响)。
公网(人在外面)
同一页点「开启公网访问」→ 等隧道建立(首次会下载 cloudflared,macOS/Linux 走清华镜像秒下)→ 手机扫「🌐 公网」二维码 → 打开链接输入 8 位访问密码(密码显示在设置页公网区块,每次开启公网变新)→ 人在外面(4G/公司网)也能访问。
更新到新版本:
dsh plugin --profile web update dsh-pocket --latest -w(跨大版本时--latest是必须的,^0.x范围不会自动升到 1.x)。
⚠️ 安全(必读)
- DSH 能执行你电脑上的代码。局域网二维码/URL 配上独立 8 位数字密码才是钥匙(密码默认开启,可关——关闭后局域网扫码直连,仅同一网络设备可访问),请勿把局域网二维码、URL 或密码发给别人
- 公网有 8 位数字密码保护:链接随机分配、每次开启换新密码、旧链接立即作废——泄露了也进不来,改密码/重开即可作废
- 公网 URL 由 cloudflared 随机分配,每次重启会变化(旧链接自动失效,相当于天然轮换)
- 局域网模式不暴露公网,只有同一网络内的设备能访问
- 适合个人自用;公网密码存本机
$DSH_HOME/dsh-pocket/token(每次开启公网自动换新),局域网密码存$DSH_HOME/dsh-pocket/token-lan(设置页手动刷新),开关状态存$DSH_HOME/dsh-pocket/settings.json
💻 DSH Desktop(桌面版)
- 桌面版里 dsh-pocket 的扫码同屏正常可用;更新/重启由桌面版管理(插件内这两项自动停用)
- ⚠️ 桌面端 advanced 模式暂不支持手机访问(该模式禁用网页布局、手机拿不到 layout 服务,会白屏)——请切回 compatibility 模式后重启;advanced 模式下手机打开会看到明确的提示层
🩹 常见问题(别踩的坑)
| 现象 | 原因与解决 |
|---|---|
dsh: command not found / 提示 DSH 未定义 | dsh CLI 没装:npm install -g @deepseek-ai/dsh,或命令前加 npx @deepseek-ai/dsh |
ERR_PNPM_ADDING_TO_ROOT | pnpm 9 对 workspace 根的限制:安装/更新命令末尾加 -w(--workspace-root) |
| 装完/更新了但界面没变化 | 必须重启 dsh web 才生效;运行中的进程仍加载旧代码 |
listen EADDRINUSE ... :3081 | 旧 dsh-pocket 进程还占着端口:macOS/Linux lsof -ti :3081 | xargs kill -9;Windows netstat -ano | findstr :3081(找 LISTENING 的 PID)→ taskkill /PID <PID> /F,后重试 |
| 版本停在 0.x 升不上去 | ^0.x 范围不允许升到 1.x:更新用 --latest(dsh plugin --profile web update dsh-pocket --latest -w) |
公网 error 1033 | 见下方「公网隧道常见问题」——多半是本机代理/VPN(Clash 等 TUN 模式)掐断了隧道 |
| 点「重启 dsh web」后页面提示进程在后台运行 | 自重启的新进程是 detached 后台进程(不挂终端),是页内更新的标准做法;停止它:macOS/Linux lsof -ti :3080 | xargs kill -9;Windows netstat -ano | findstr :3080 → taskkill /PID <PID> /F(日志在 $DSH_HOME 下 dsh-pocket-restart-*.log) |
⚠️ 公网隧道常见问题(必读)
现象:点「开启公网访问」后,手机上打开公网地址报 error 1033(Tunnel error)。
最常见原因:本机开着代理/VPN(Clash、Surge、v2ray、sing-box 等,尤其 TUN 模式)。
这类工具会接管全部流量,并常常把 cloudflared 的隧道边缘连接
(*.argotunnel.com、Cloudflare 边缘 IP)掐断,导致隧道注册成功但数据面连不上。
解决(从轻到重,按顺序试):
- 先只关闭代理的 TUN 模式,不用退出代理软件——多数情况这一步就够:
- Clash:设置里关掉「TUN 模式」开关(或右键菜单栏图标 → 取消勾选 TUN 模式)
- Surge:关「增强模式」;v2ray/sing-box:关「虚拟网卡/路由接管」
- 然后回设置页重新点「开启公网访问」
- 仍不行就彻底退出代理软件(不只是关界面:Clash 要右键菜单栏图标 → 退出;若装有
后台服务还要在服务管理器里停掉,
ps aux | grep clash确认进程消失),再重试 - 给代理加直连规则,放行隧道域名与 Cloudflare 边缘(Clash 规则示例):
- DOMAIN-SUFFIX,argotunnel.com,DIRECT - DOMAIN-SUFFIX,trycloudflare.com,DIRECT - IP-CIDR,198.41.192.0/24,DIRECT,no-resolve - 网络实在不通时,改用局域网模式:手机开热点 → 电脑连手机热点 → 扫局域网码, 效果完全一样(人在外面也能用)
其他可能:企业防火墙/校园网拦截出站;此时请让 IT 放行或改用热点。
首次开启时「下载 cloudflared」失败/卡住:
- macOS/Linux:优先走清华镜像(实测 ~3MB/s,几秒下完);失败自动回退官方 GitHub + 加速源。
- Windows:无清华镜像(Homebrew 不支持 Windows),走官方直连下载(约 50MB,单线程会慢,属正常,耐心等几分钟;也可挂代理加速)。
- 全部失败时设置页会给出提示。备选方案(任选其一):
- 手动装好命令行 cloudflared 后重试(装好后 dsh-pocket 直接用 PATH 里的,不再下载):
- macOS:
brew install cloudflared;Linux:sudo apt install cloudflared或官网下载 - Windows:
winget install cloudflared或官网下载 - 任何平台:
npm i -g cloudflared
- macOS:
- 挂代理(系统代理/Clash 等)后重新点「开启公网访问」
- 手动下载二进制放到
$DSH_HOME/dsh-pocket/bin/目录($DSH_HOME一般是~/.dsh,Windows 是%USERPROFILE%\.dsh;文件名用cloudflared(Windows 加.exe)或发布资产名均可,插件都认)
🗂 架构(单包)
| 文件 | 说明 |
|---|---|
lib/index.js | 插件入口:自动起代理 + 注册 RPC + 访问密码管理(公网 8 位每次开启变新;局域网独立 8 位可手动刷新/开关)+ 桌面端环境适配 |
lib/settings.mjs | 设置持久化:局域网密码开关(默认开启)存 $DSH_HOME/dsh-pocket/settings.json |
lib/service.mjs | 服务:代理生命周期(端口自适应)、公网隧道(自动恢复)、状态快照(含二维码) |
lib/proxy.mjs | 改头反向代理:Host/Origin → loopback,HTTP + WebSocket 透传 + polyfill 注入 + gzip/brotli 压缩 + 按 Host 区分的访问令牌认证(公网必验;局域网按开关) |
lib/tunnel.mjs | cloudflared:多镜像源下载(清华优先)/自适应多线程/启动/解析公网 URL(HTTP/2) |
lib/web-rpc.js | loopback RPC:status / tunnel.start / tunnel.stop / version / update / restart |
client/ | 设置页「手机访问」+ 移动端适配(dsh-web-mobile 移植) |
bin/dsh-pocket.mjs | CLI:局域网/公网模式,打印 URL + 二维码 |
🛠 开发
npm install
node client/build.mjs   # 改 client/ 后重新打包
npm test                # 代理 / 认证 / 压缩 / 隧道 / 服务 / RPC(43 测试)
🤝 致谢
- 移动端适配移植自 mexiaosqwq/dsh-web-mobile(MIT)
- 公网隧道基于 cloudflared
📄 License
GPL-2.0 —— 自由软件许可:可自由使用、修改、分发,但修改版必须同样以 GPL 开源并保留版权声明;商用同样适用。
说明:移动端适配部分移植自 dsh-web-mobile(MIT 许可,兼容 GPL),其版权声明保留在
client/mobile/LICENSE.dsh-web-mobile。
有问题?欢迎反馈:遇到 Bug、有想法、想提需求,请到 GitHub Issues 告诉我们 🙏
Read the usage guide →
Install steps, key points, FAQ and compatibility for this plugin — auto-derived from indexed fields.
Listing badge

[](https://deepseek-plugin.org/plugins/shaobeichen/dsh-pocket)Paste this markdown into your GitHub README to link back to this listing. The badge only states the listing — not a security endorsement.